Smooth Loading Screen
What is it?
A subsystem that handles the creation and managing of loading screens during gameplay. The created widget allows for UMG animations and clean transitions.
How did I make it?
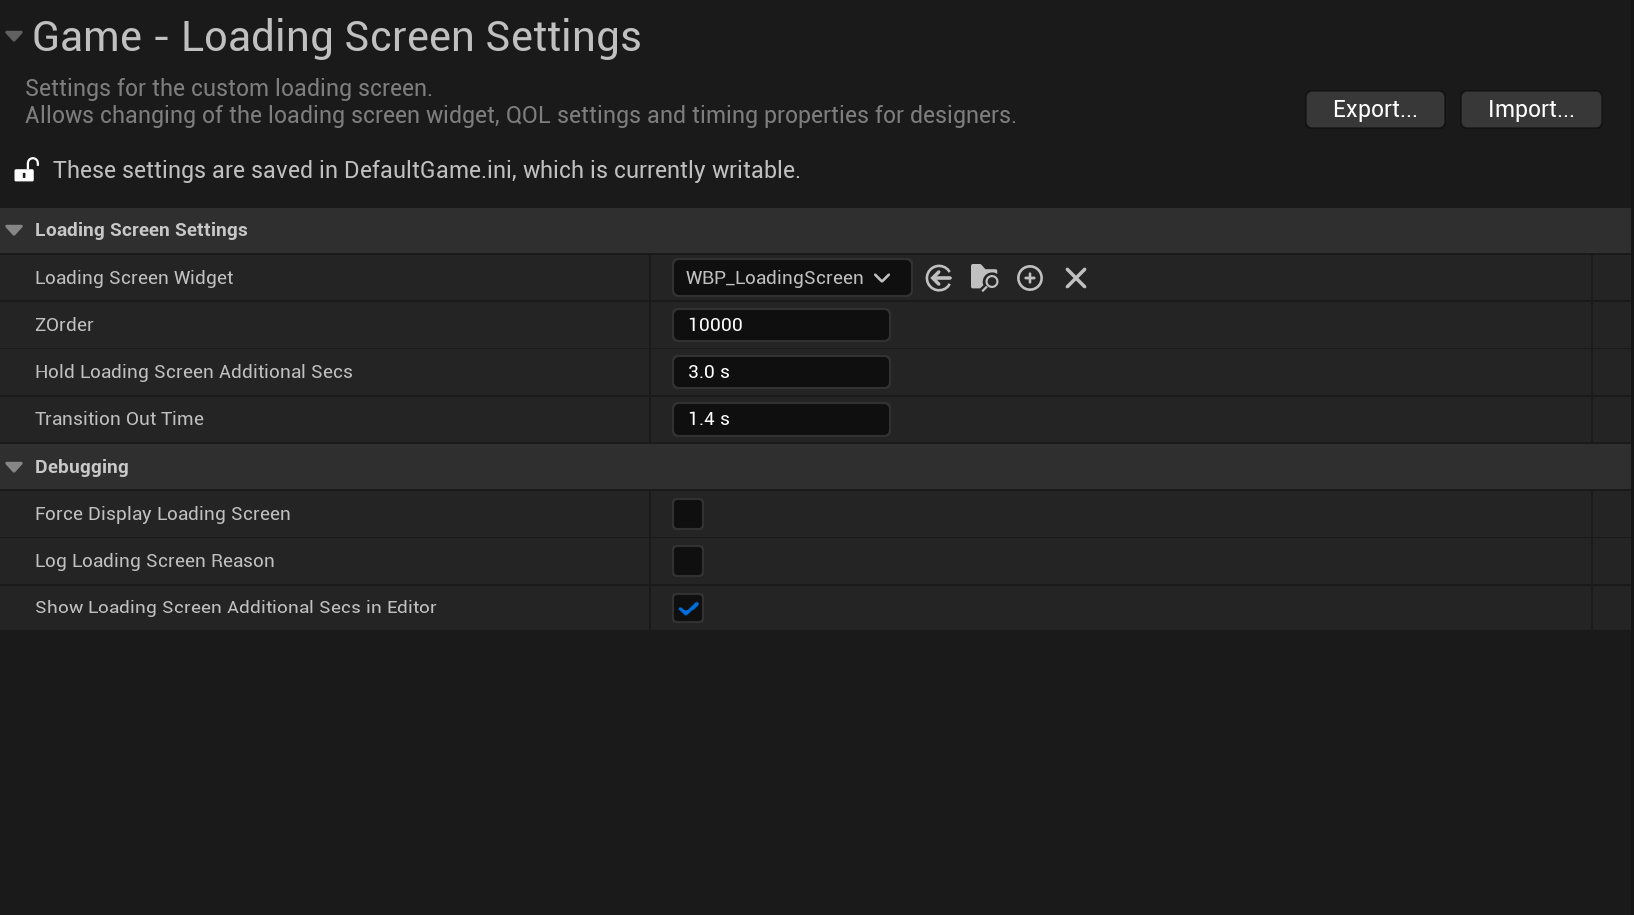
By hooking into Core delegates provided by Unreal, we can be alerted when the Engine starts switching levels. When this happens, we create the specified widget that is then added to the viewport and registered for updates.
Optimizations
When the screen is fully covered by the loading screen, we can enable a couple optimizations to speed up loading. These include disabling rendering and prioritizing level streaming. We could also tweak the ShaderPipelineCaching to help it further, but that was not done for the project.
Transitions
By allowing designers to explicitly enable the loading screen, we can add transitions to the loading screen to make it more smooth. This is controlled through the settings, and requires that the loading screen have a minimum uptime which is enforced automatically.
A callback in the loading screen widget gives the designers a chance to play animations when transitioning in and out of the widget.
Hidden in-editor
While implementing the loading screen, I quickly realised that having it enabled for in-editor testing would get annoying very quickly, even more so
if the minimum up-time is a value above 0.5 seconds like for Access Acquired.
To remedy this, I added the 'Show Loading Screen Additional Seconds In Editor' boolean that will keep it visible for the shortest possible time
when the loading screen is triggered. This made everyone in the team very happy to hear.
Takeaways
- Making a loading screen was simpler than I thought which is nice for a change.
- Since we have full control over the displayed widget, it could easily be made dynamic to match the game area or loading destination.
- If done again, I would look into more optimizations to get the most out of the guaranteed uptime of the loading screen.
Multilayer Game UI
The text on the top of the video denotes which layer the upper-most visible widget is part of.
What is it?
My approach to giving Access Acquired a system to handle multiple menues and prompts, while keeping implementation and usage simple for designers. By using three Widget Stacks, we can establish a set hierarchy of layers that define how widgets are prioritised, and how they interact with eachother.
A case study
I wanted to create a solution that would allow us to mix menues and modal widgets. The HUD would not need to be swapped during gameplay for Access Acquired, but being able to add/remove it whenever would be a plus. I looked at ARC Raiders for inspiration, where a similar layer structure can be seen.
I will refer these three layers 'Game', 'Menu' and 'Modal', which is what I called them in Access Acquired.
The first one would most often be used for the HUD, and similar full-screen in-game content.
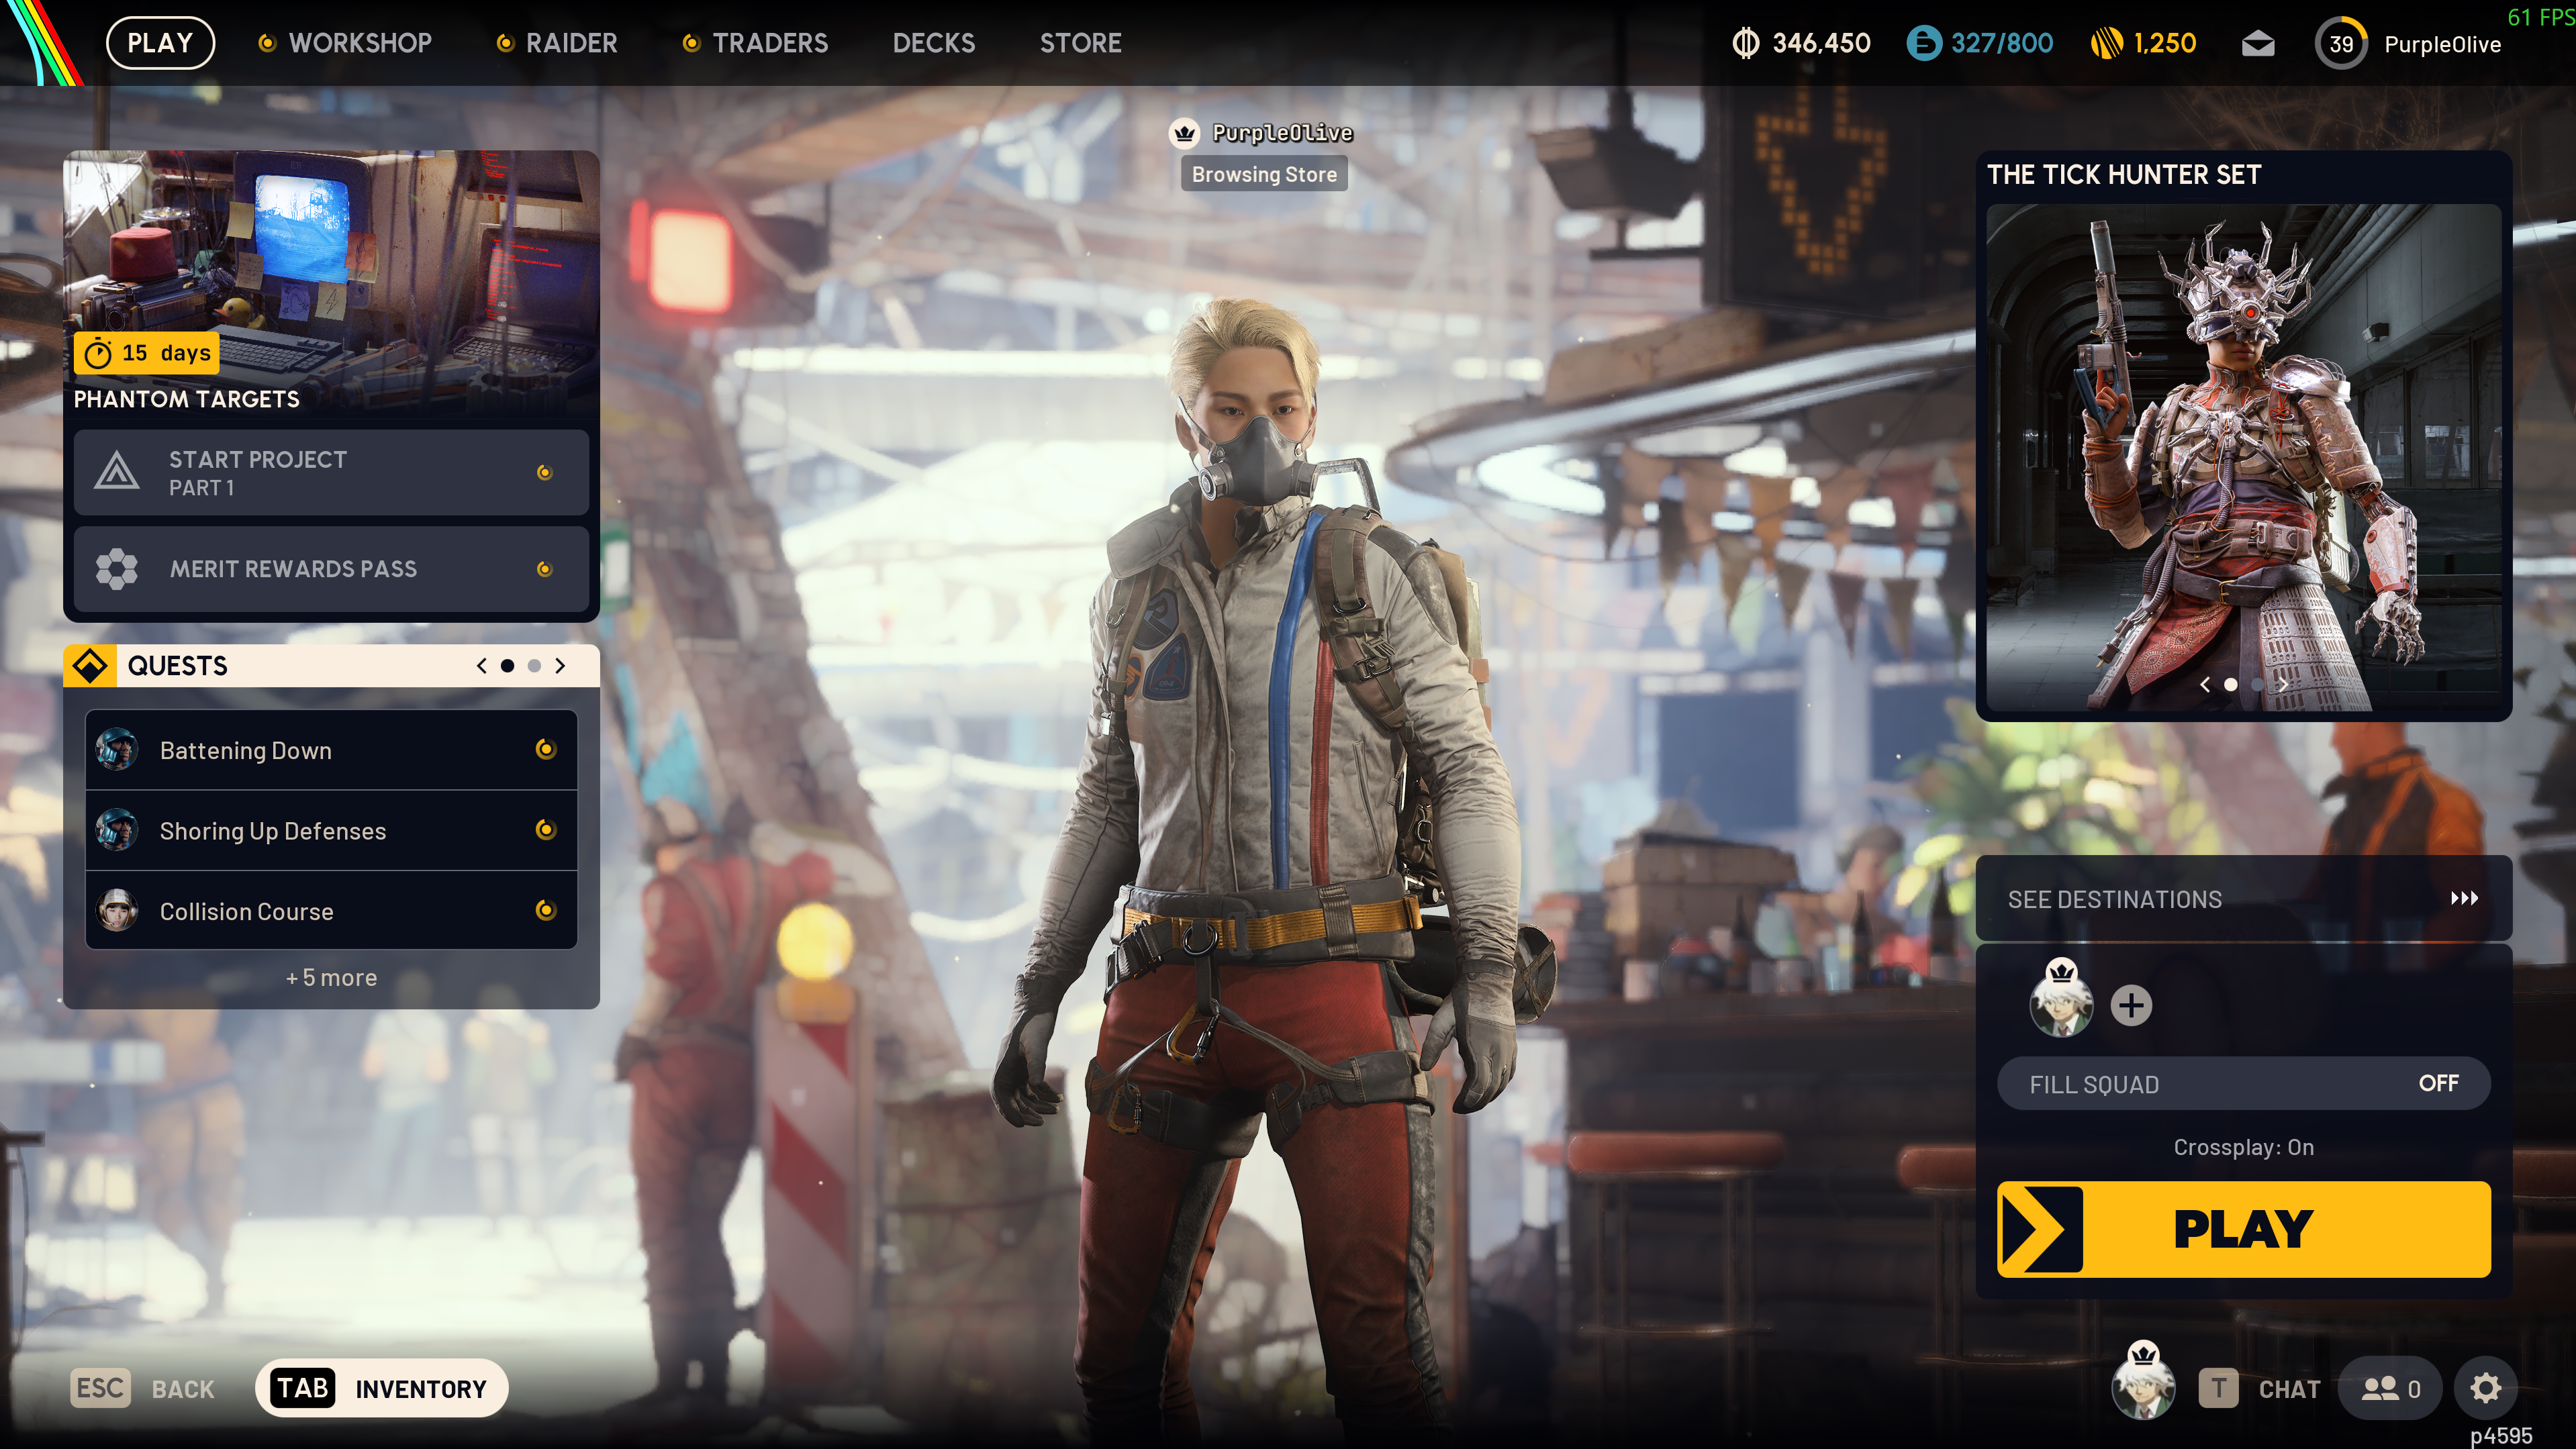
Shown in the image above is the menu base, where navigation starts from and is the first view the player gets of the main in-game menu.
This would be placed in the 'Game' layer, and each submenu (e.g 'Play', 'Workshop', 'Raider', etc.) seems to swap out this widget.
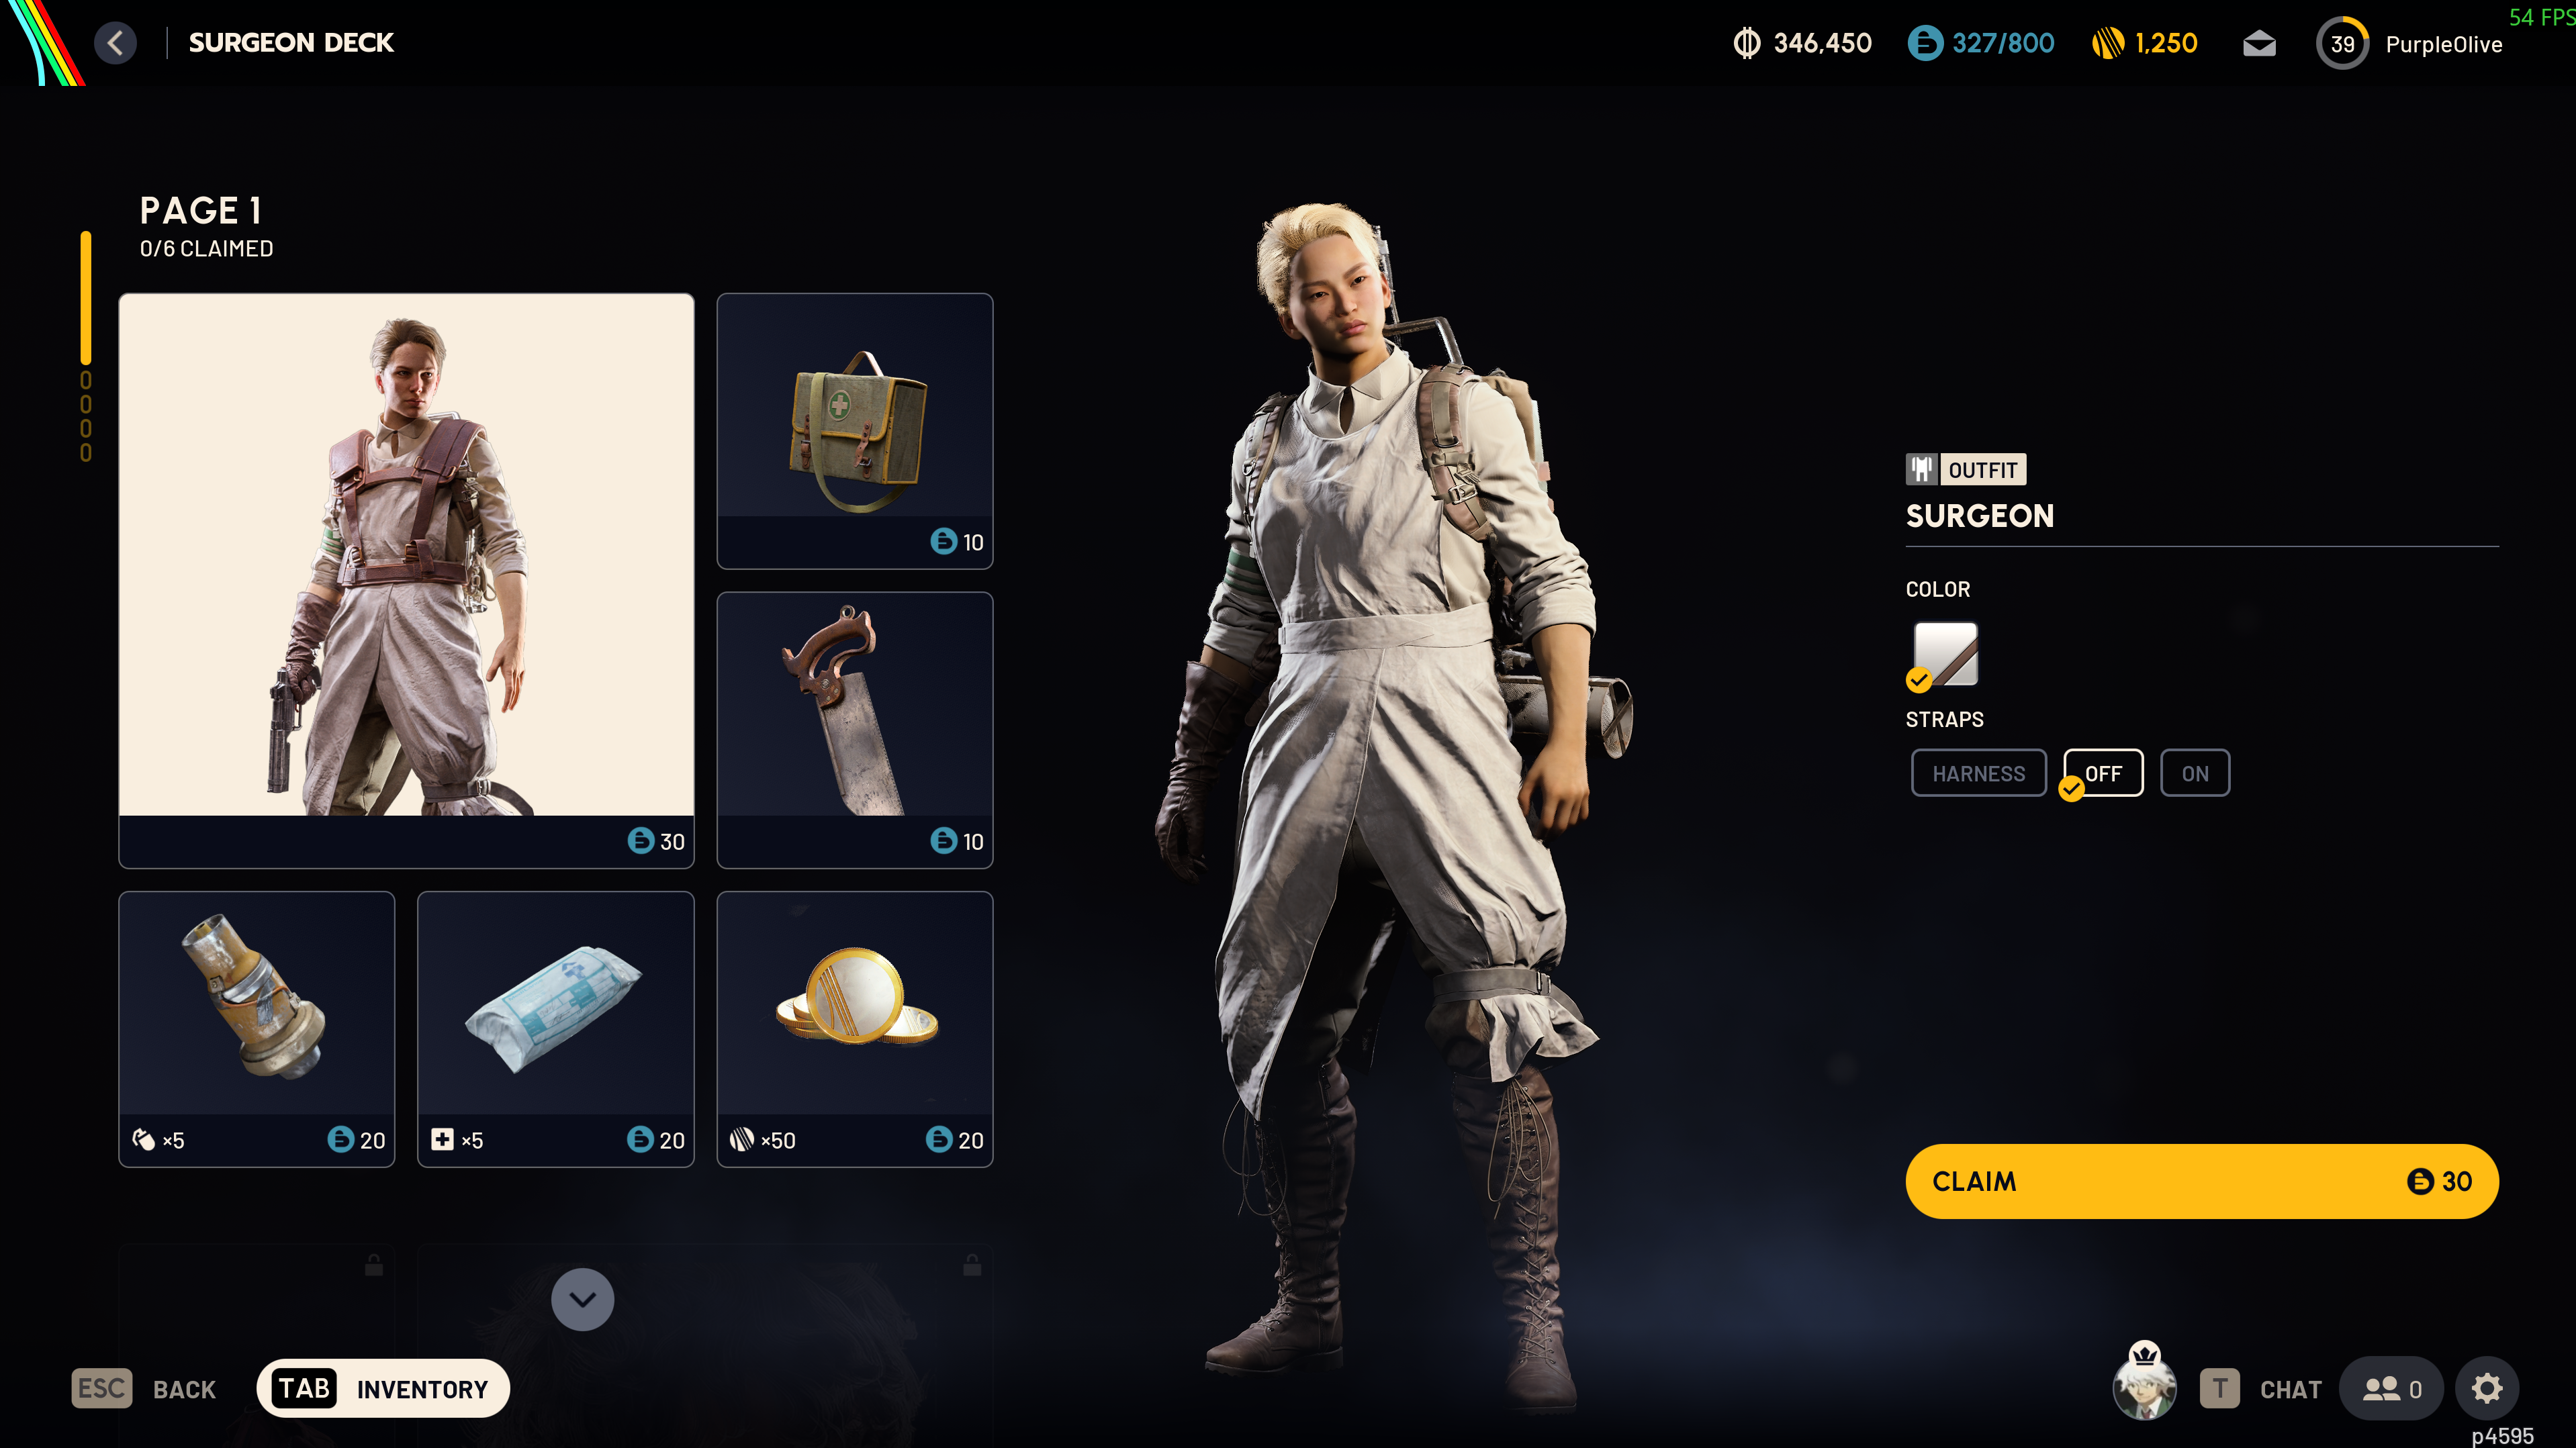
Here we have what seems to be a submenu, as it completely covers the menu base I showed above.
This would therefore be placed in the 'Menu' layer.
Navigating back sends us back to the menu base as expected while removing the submenu from view, which suggests
that ARC Radiers also use Common UI for navigation handling (or a in-house version if it), which I use for Access Acquired.
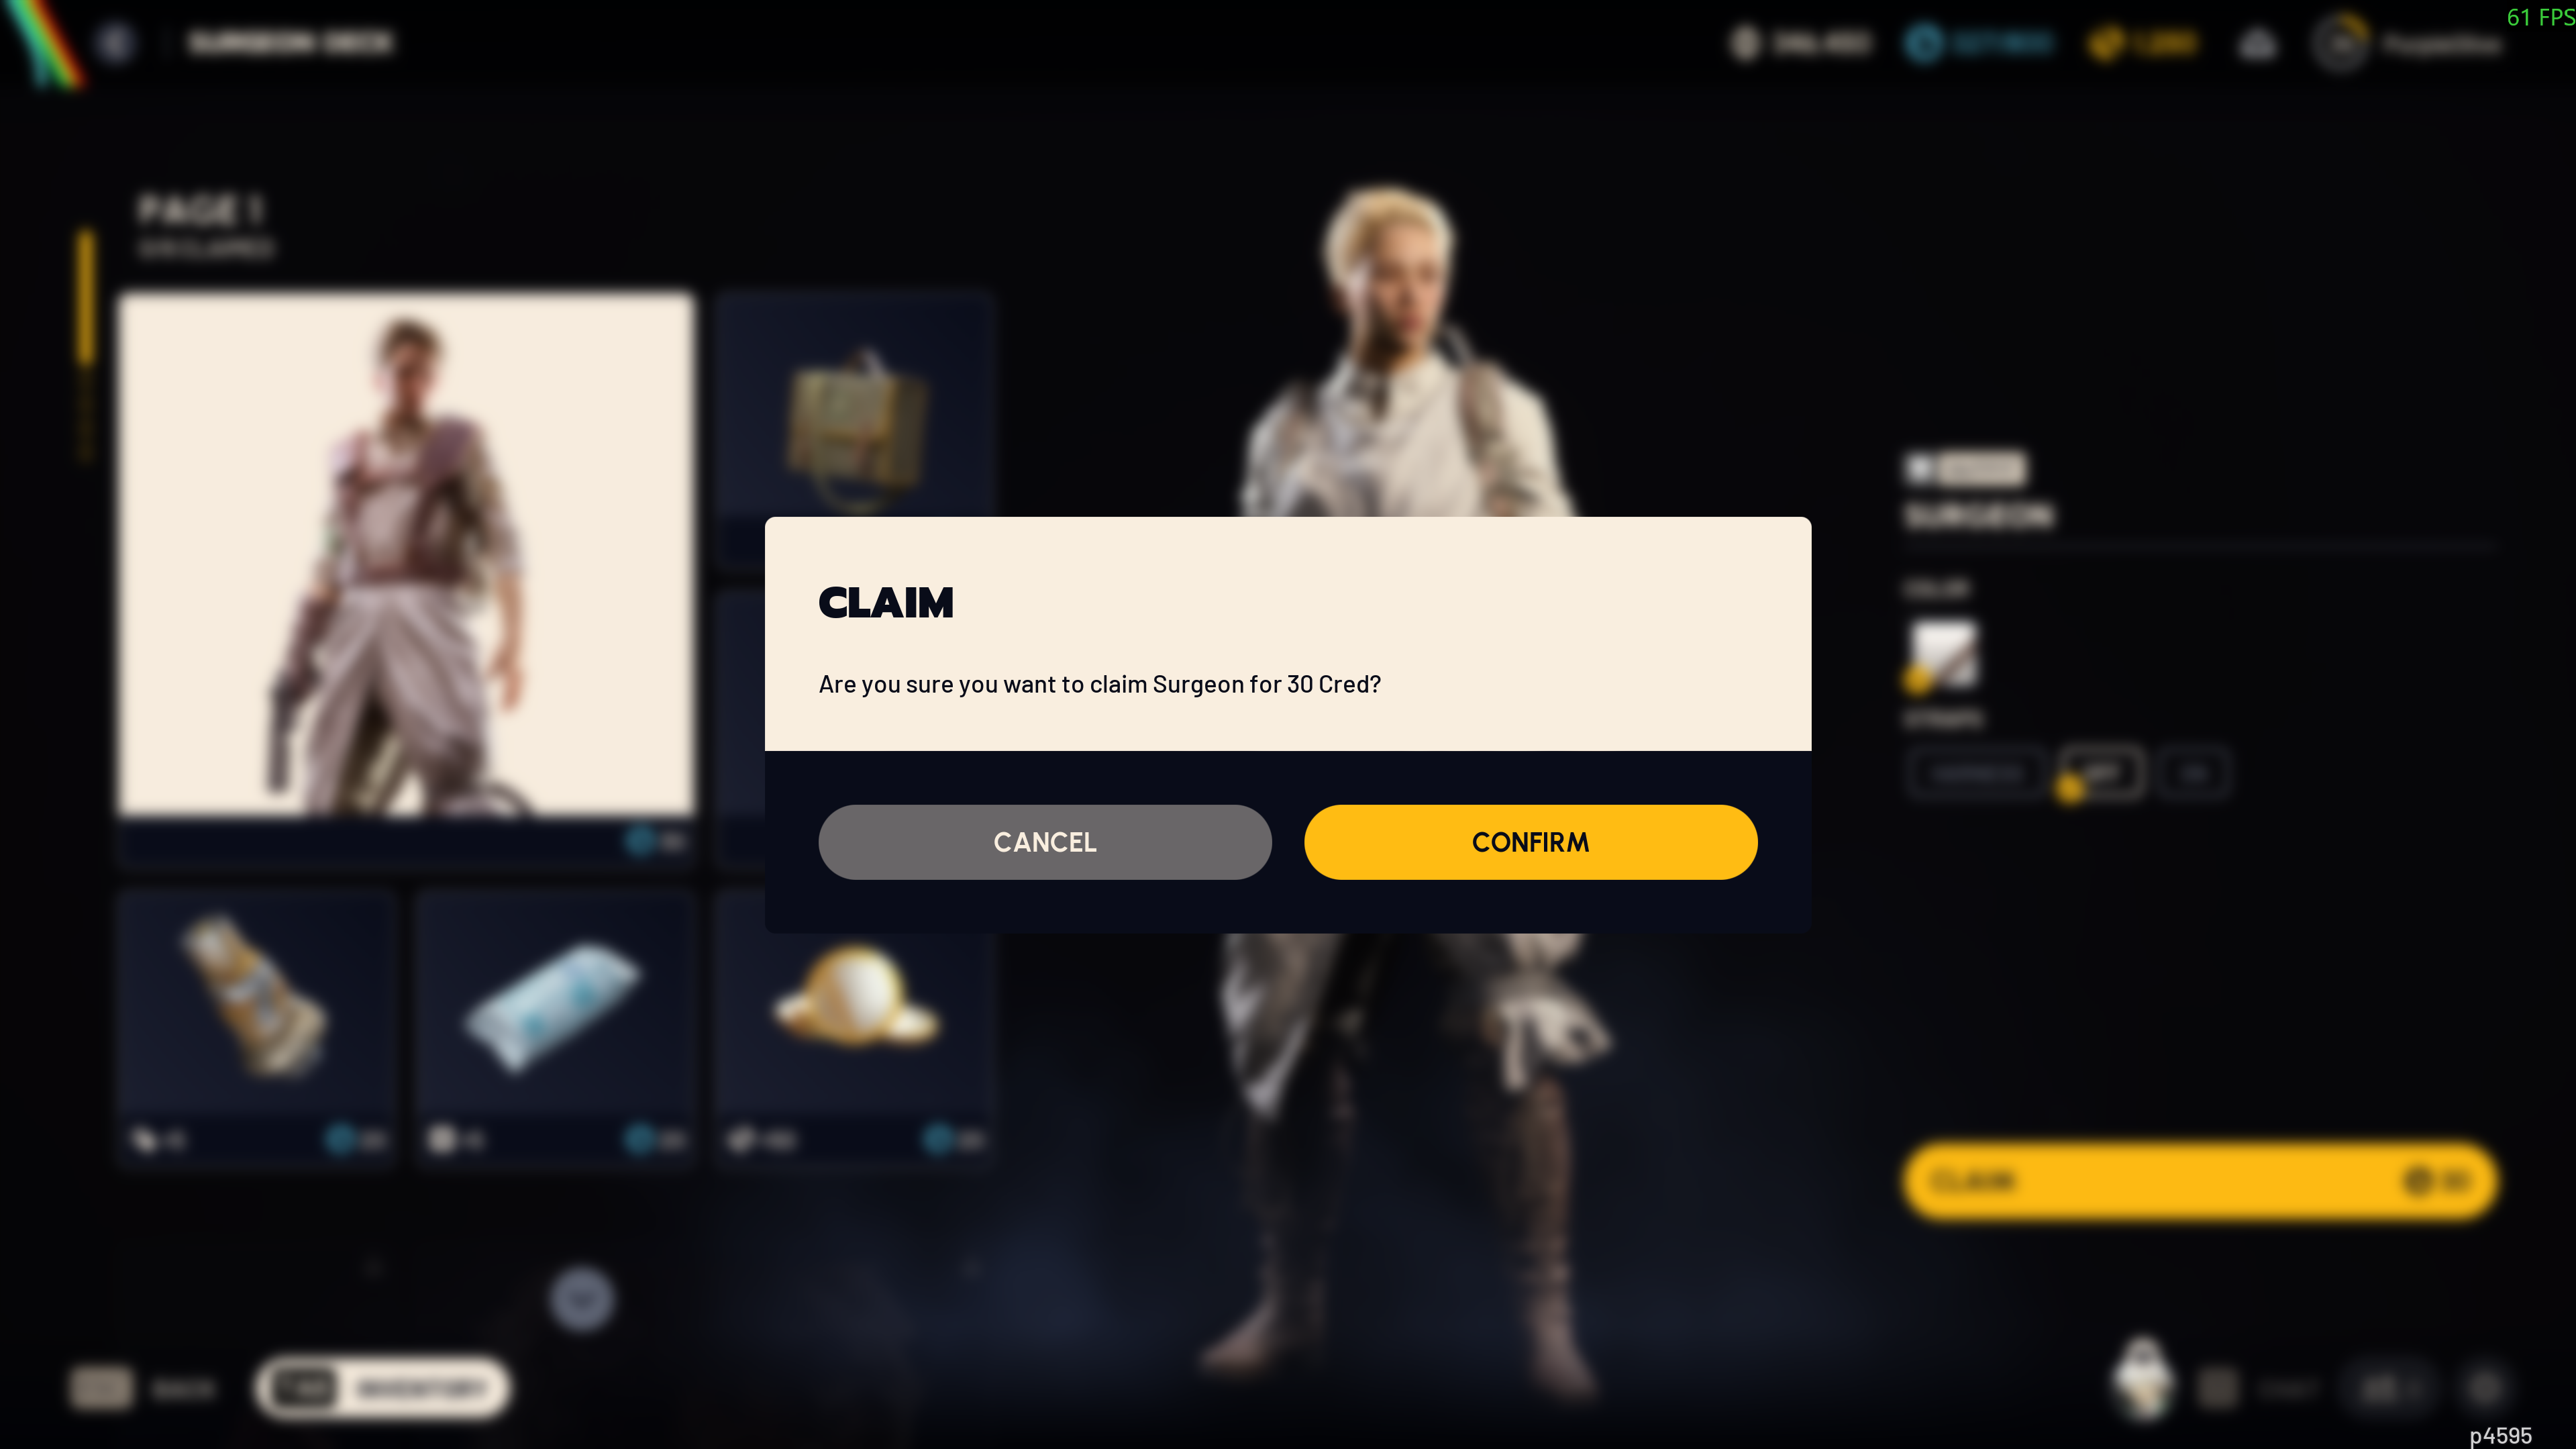
Finally, when attempting to buy the bundle we get a confirmation popup, which would indicate its handled in the 'Modal' layer since we can still see the previous menu visible behind it. Any navigation from the modal closes it and shows us the submenu again.
How did I make it?
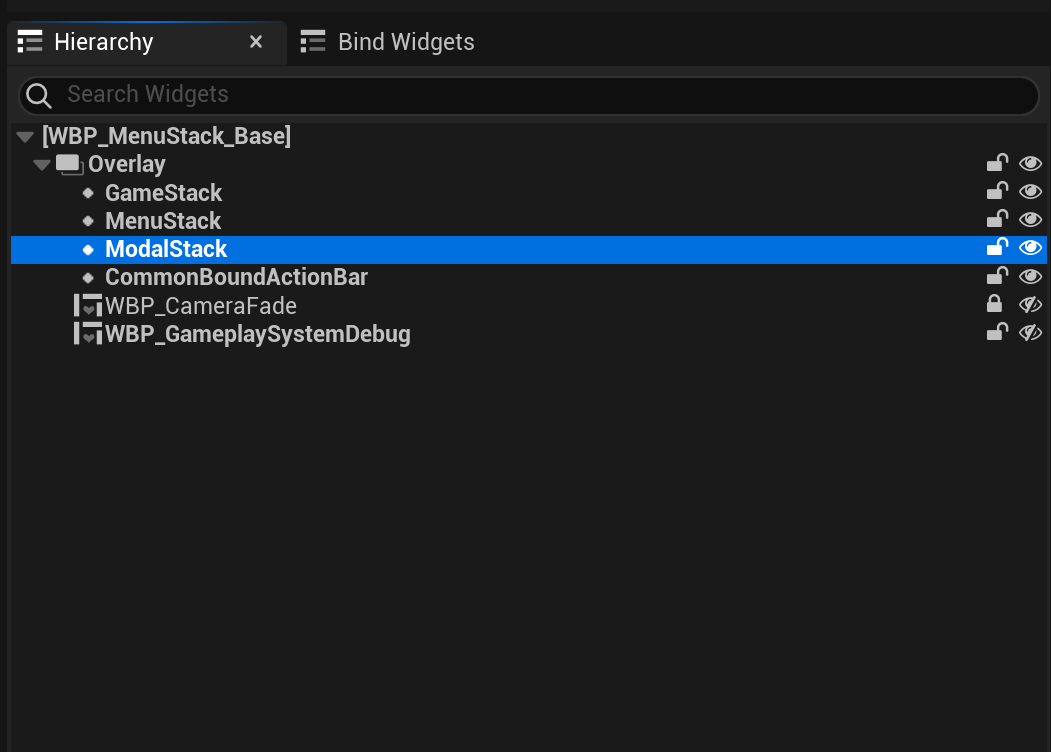
By using multiple Common Activatable Widget Stacks (CAWS) as the layers we can get the desired behaviour, where the CAWS pool the widgets for us and ensured that only one widget is visible at a time, per layer.
When a widget in the CAWS is removed it's popped from the stack and the next widget in the stack (if any) is displayed automatically.
All other game widgets are added and displayed through the three layers, 'Game', 'Menu' and 'Modal' through a C++ and blueprint interface.
The CameraFade, debug and CommonBoundActionBar widget have predefined layering and should never be swapped out, and are not part of the stack setup.
Access Acquried UI
Below are more examples of the UI I worked on for Access Acquired, that rely on this multi-layer setup to integrate smoothly with gameplay and other widgets.
Takeaways
- While it seems limiting first, splitting up UI into layers helps keep a consistent behaviour that can help users learn the layout more quickly.
- Games can choose to use more or less layers, where a layer could potentially be dedicated to act as backgrounds for other widgets.
- It is not possible to display multiple widgets per layer, so HUD elements still needs to be layered within the widget itself.
Slate UI Customization
What is it?
A simple Slate customization that replaces Unreal's default UI for the type when viewed through the editor.
This allows the values to be immediately be displayed and viewed when opening any blueprint or DataSet that contains the type.
The problem
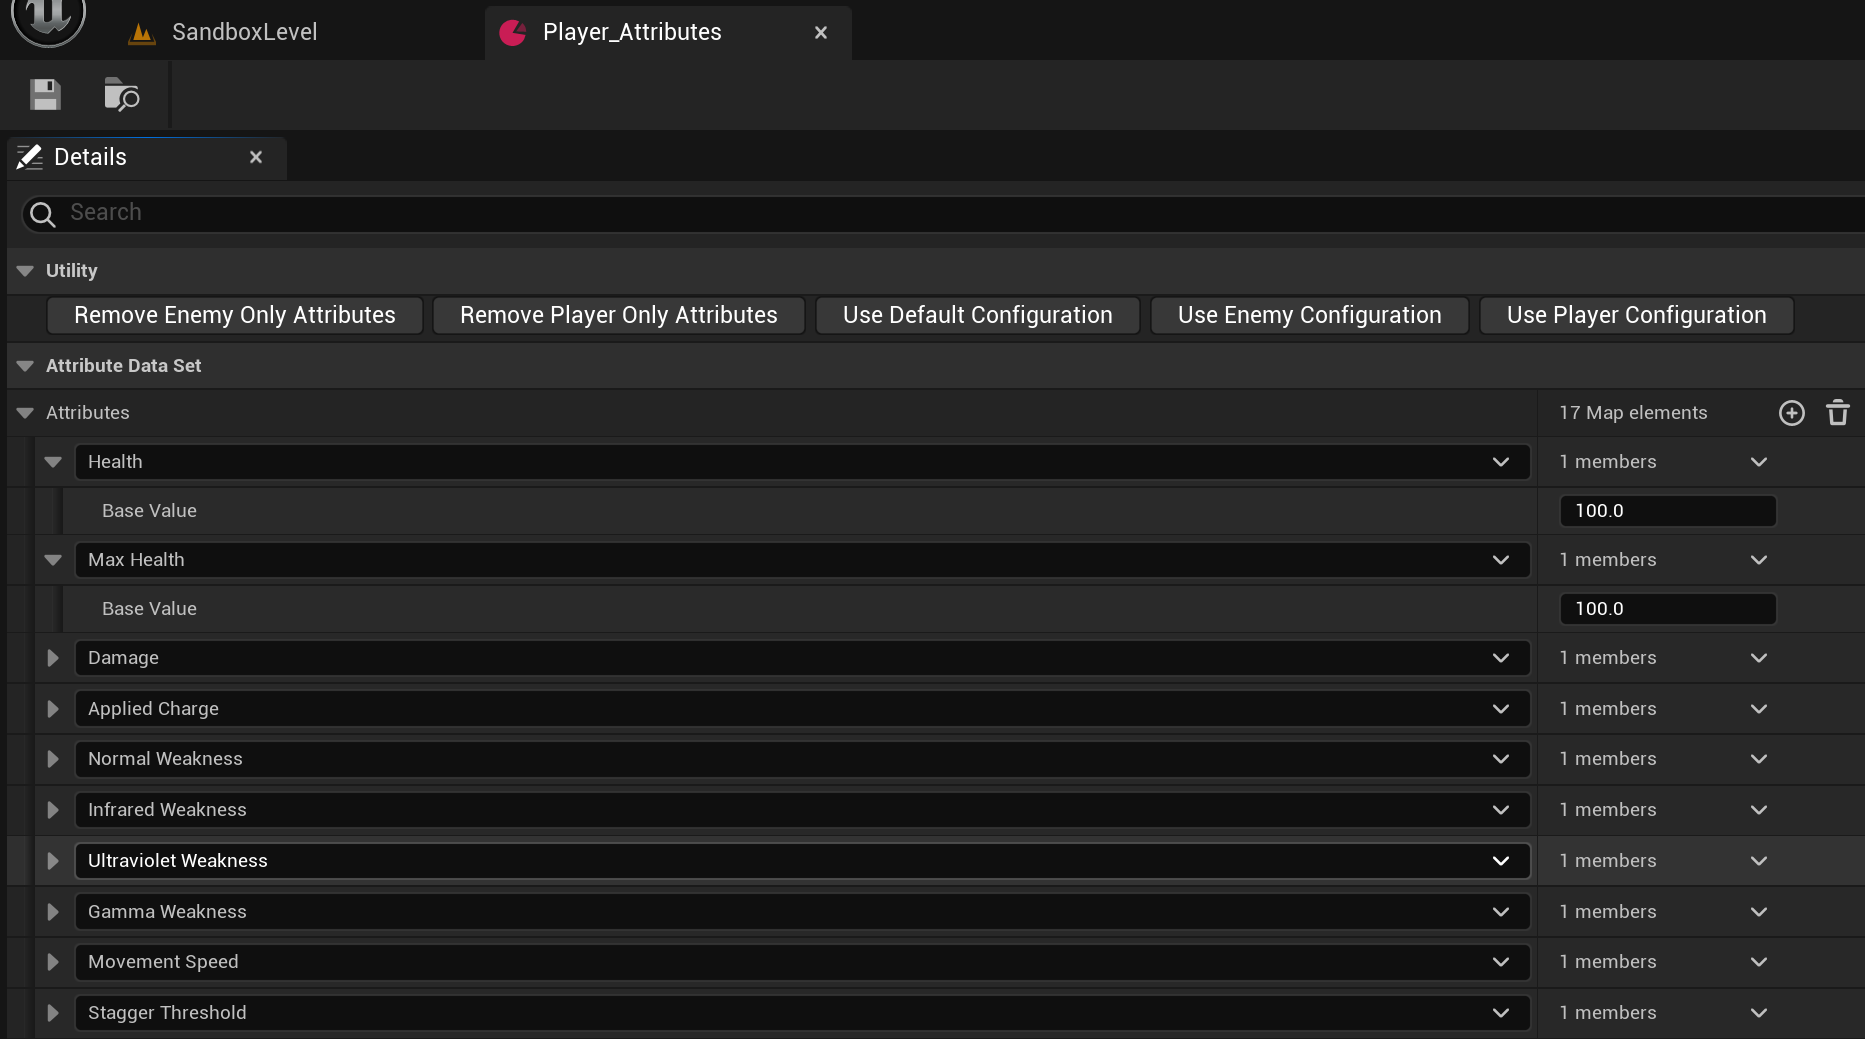
The UI generated by Unreal for blueprint-exposed properties has one major flaw - they are always vertically-aligned and try to display
content in rows, with each row representing one property. This works well for most applications, but not as well for structs in array-like containers.
The attributes are changed often when playtesting and balancing the game, and for designers to need to expand each attributes dropdown individually
is incredibly tedious and annoying. I wanted to address this issue by making my own UI, where the properties are immediately visible and accessible.
How did I solve it?
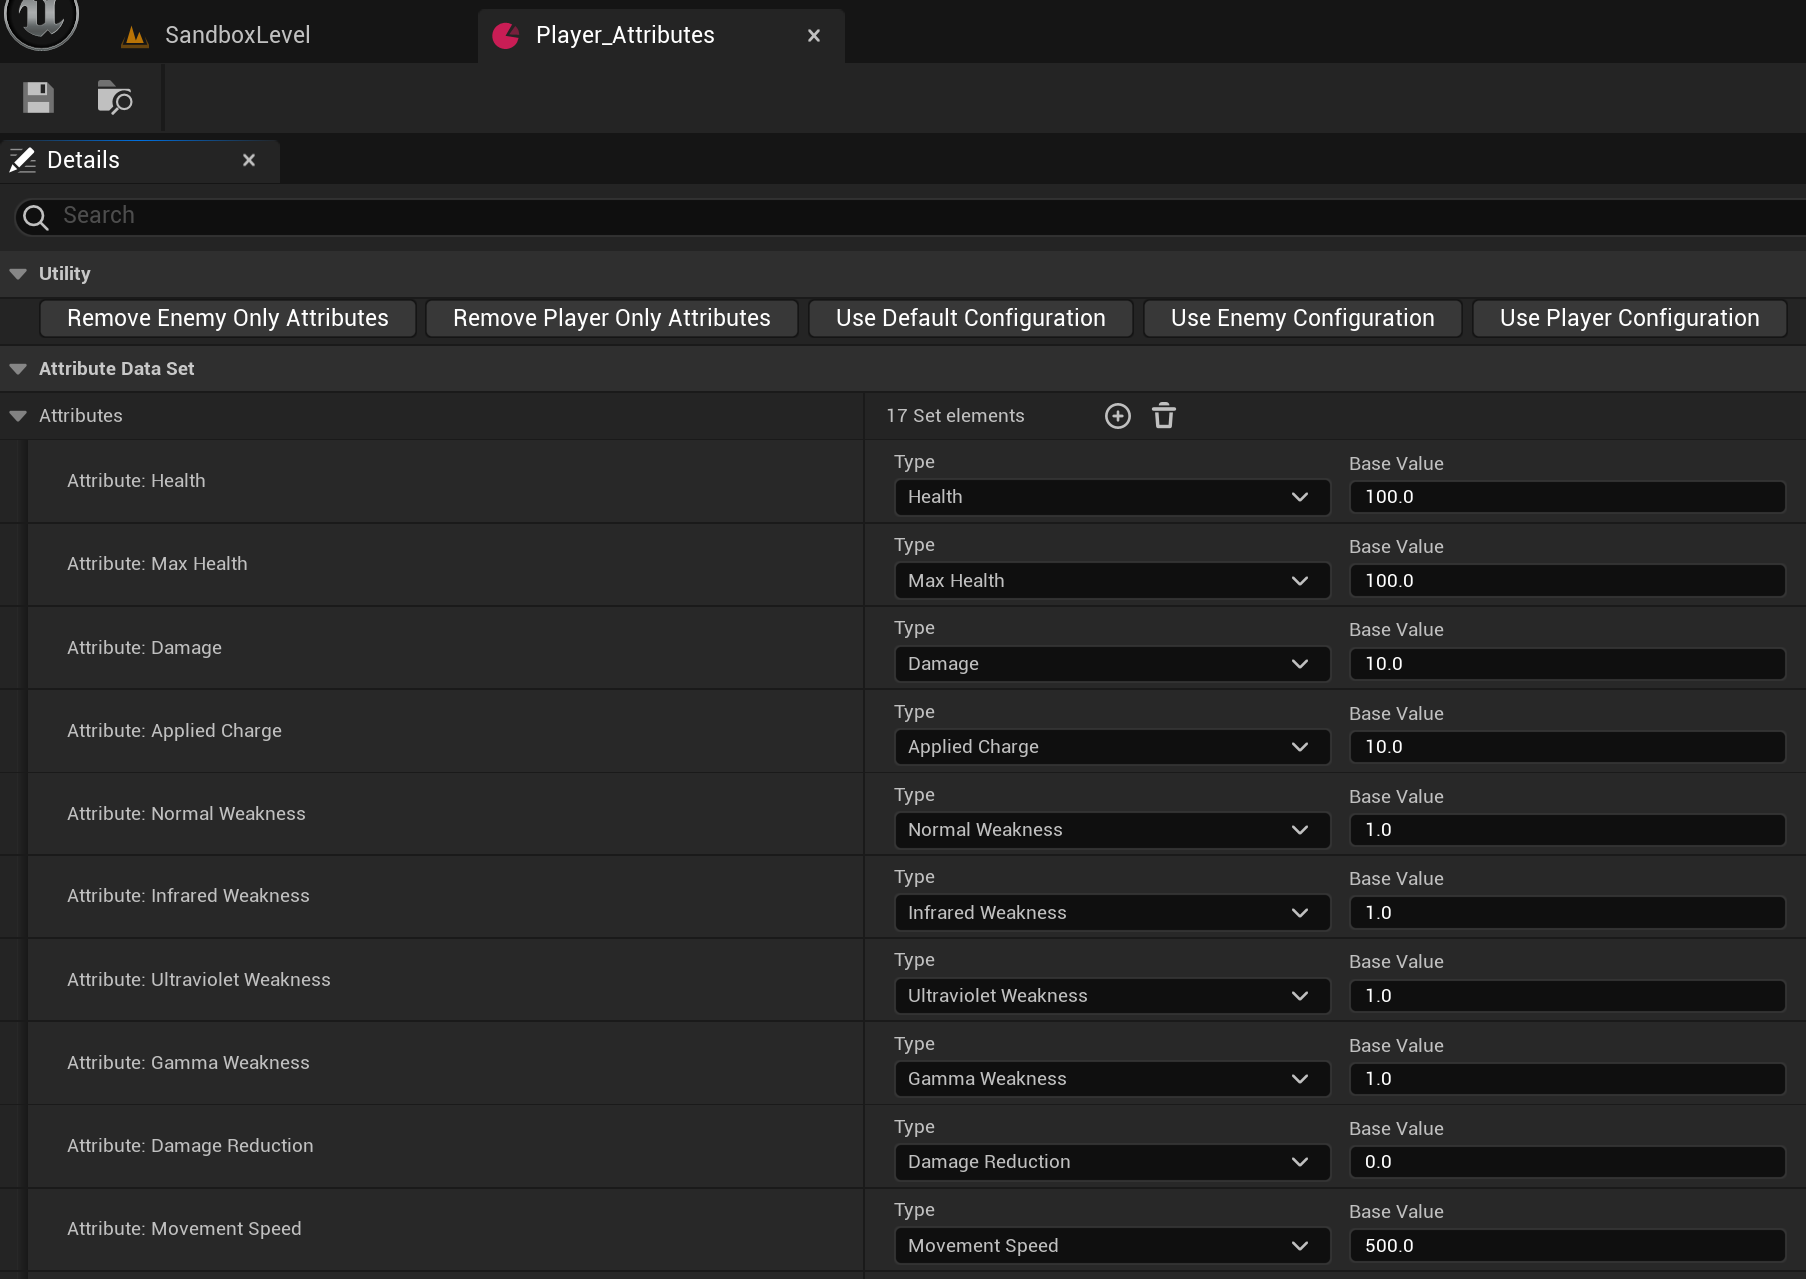
My immediate goal was to solve the core problem: Making the UI horizontally-aligned instead of laid out vertically.
I achieve this by creating a row to work in the ChildBuilders AddCustomRow() method.
We can then display the attributes name in the aptly named NameContent(), while the types properties are
displayed in a SHorizontalBox in ValueContent().
I use CreatePropertyNameWidget() and CreatePropertyValueWidget() to display the properties together in
a SVerticalBox to place them ontop of eachother, which saves some needed horizontal space.
Another benefit of using Slate is that new data can be displayed, without needing it to exist in the types UProperties.
I use this to display the name of the attribute on the left, to allow designers to more quickly search for the wanted property.
Adding unique content to the UI this way is much better than the naive solution of simply adding the data as a member to the type,
and updating it through methods or type constructors while letting Unreal handle the rest with its automatic property display.
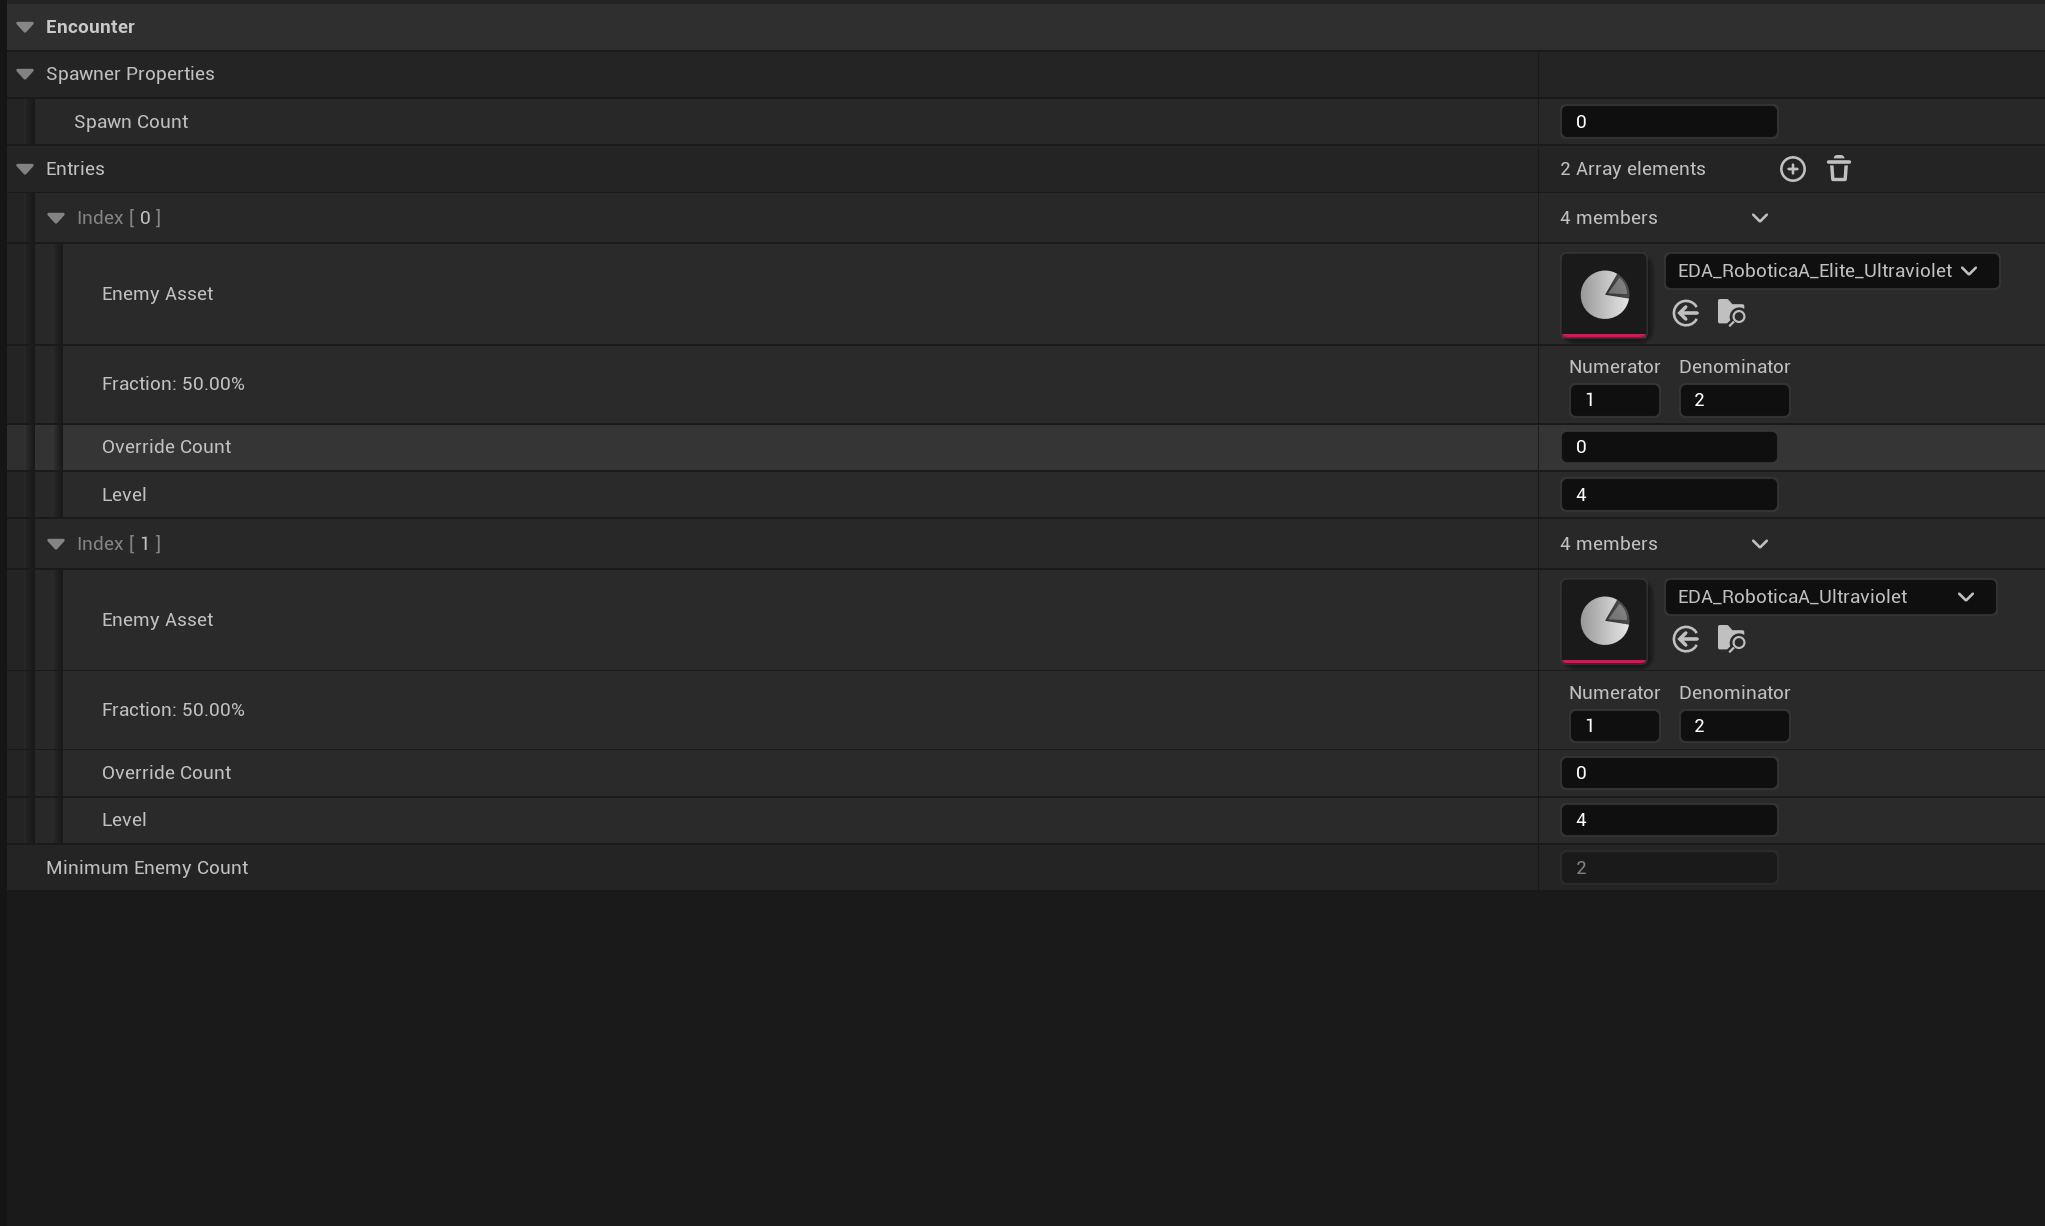
I've also created some other Slate UI customizations, that I won't dive into deeper here.
Takeaways
- While Slate's declarative syntax is quite different to working with UMG, most of the UMG-knowledge is easily transferable to the new syntax.
- The UI presentation of the type is greatly improved, making it well and truly worth the effort.
-
A drawback is that UI customization requires upkeep - any future property added to the type needs to also be displayed through the Slate code.
As such it might not be fit for types that will change frequently without needing to go yell at your UI programmer to update their code.
Portfolio
What is it?
It's this website! I made it from scratch using HTML, CSS and Javascript to create the design, layouts, elements, functionality and ofcourse the written content and information.

Show me some cool stuff!
Since HTML lacks both preprocessor directives and macros, its difficult to avoid copying elements around when creating site-wide dynamic behaviour. I solve this for my site by relying on two techniques:
DOM Injection
Using my own declarative syntax I can create DOM elements on the fly, that are then inserted into the DOM structure at runtime. The syntax was inspired by Unreal's Slate system which also relies on declarative syntax, albeit alot more sophisticated than mine.
HTML Injection
For some elements I instead utilize HTML injection, where an HTML files content is inserted into a empty element to allow any kind of content to be added. This is typically easier since you still write in HTML, whereas DOM injection requires a non-html syntax.
Takeaways
- Web development has a lot in common with UMG or Slate, with box using their own take on the box-model for layout and design.
- Going from C++ to Javacript is quite the change, especially for a larger project as this. The lack of explicit types, outside of what the Typescript libraries give you, is challenging to work with when starting out.
- If I had more experience with web-dev, I would have liked to try to do the content injection only on the server-side HTML, and then send the complete HTML to clients to avoid stutters and the extra delay that the injection creates.